

Objective
The goal of this blog post is to explain a complete workflow to use a MetaHuman in Blender and convert it into a game-ready rig.
This workflow allows you to use your MetaHuman character:
- inside Blender
- with a custom rig
- to create your own animations
- and reimport it into Unreal Engine 5 for runtime gameplay usage
This tutorial uses paid plugins.
Youtube Video Version
Prerequisites
-
Poly-Hammer
https://www.polyhammer.com/ -
Auto Rig Pro
https://superhivemarket.com/products/auto-rig-pro -
Auto Rig Pro – Quick Rig
https://superhivemarket.com/products/auto-rig-pro-quick-rig
Useful Resources
- NEW Unreal Engine 5.6 MetaHuman to Blender Workflow
https://youtu.be/7hxXIeDM7sA
Unreal Engine 5 Side
I use the Poly-Hammer plugin to import MetaHuman DNA files into Blender.
This allows us to keep:
- the body and head meshes
- the original proportions
- the rig structure
- all blendshapes intact
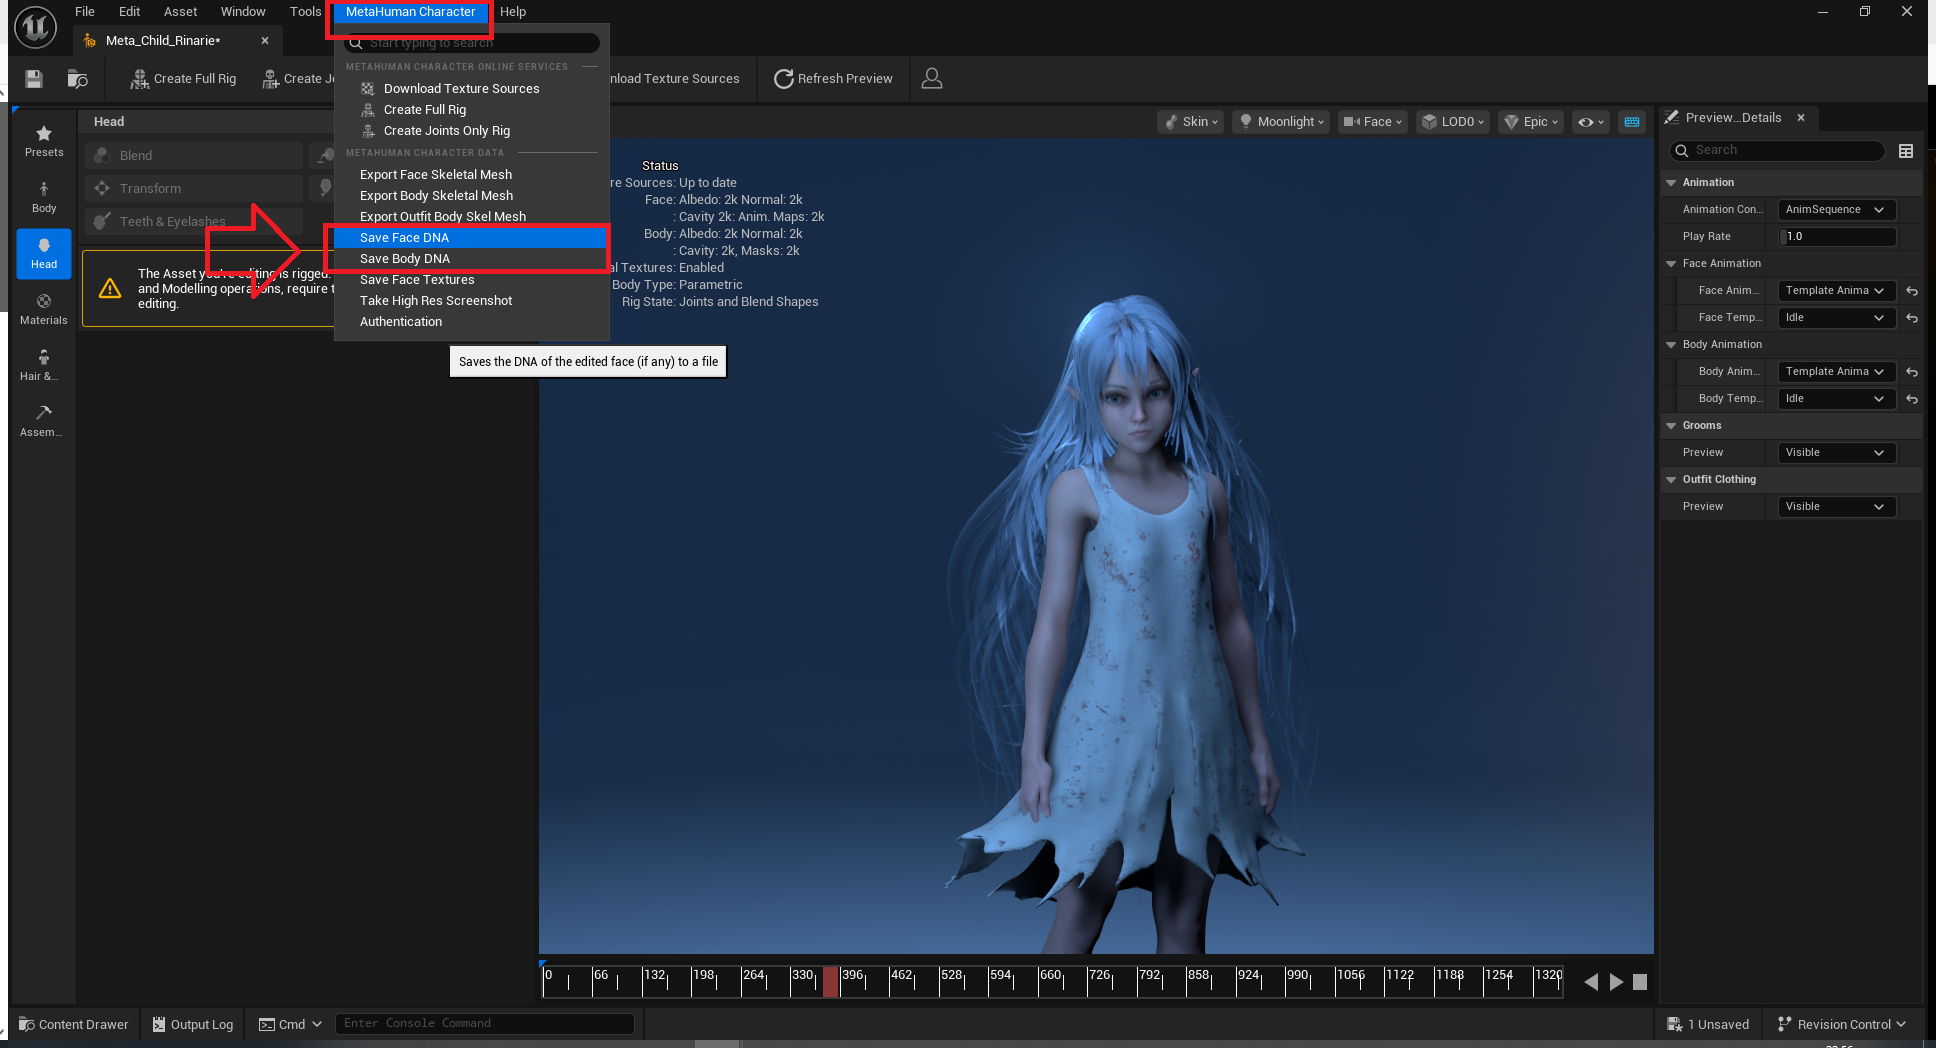
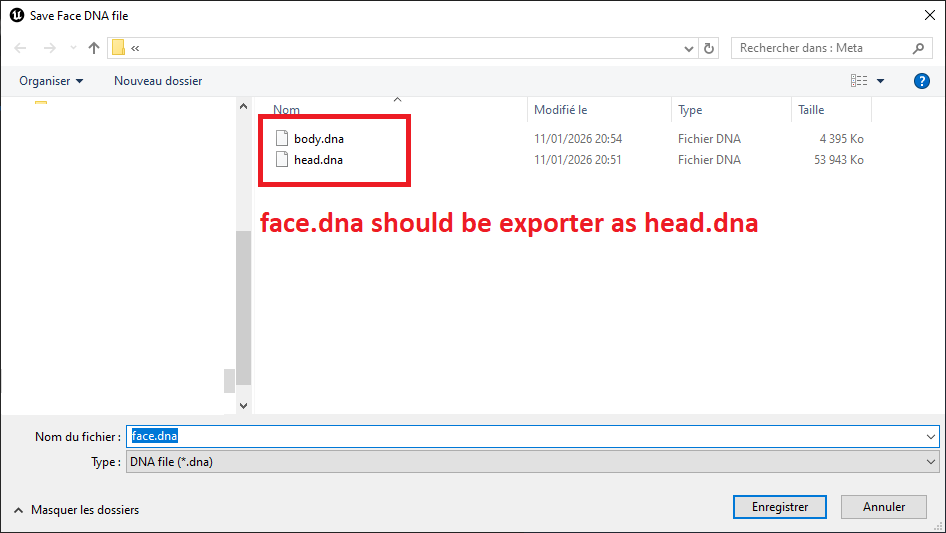
The head DNA must be named head.dna and not face.dna.
Poly-Hammer requires this exact name to correctly detect and link the head with the body later in the workflow.
Blender Side
This workflow uses Blender 4.5 LTS.
Be careful if you are using an older version.
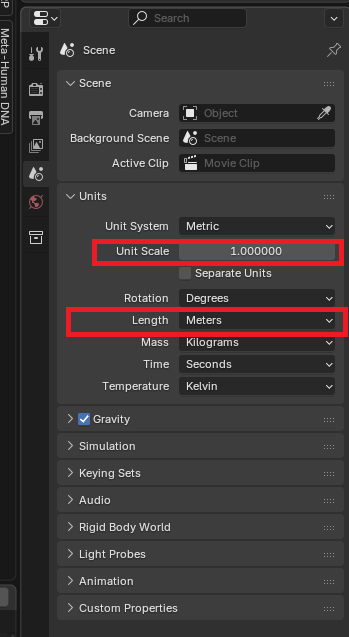
Before importing the DNA files, make sure your Blender scene uses the correct units:
- Unit Scale:
1.0 - Unit System:
Metric - Length:
Meters
This is important to avoid scale issues when exporting back to Unreal Engine.
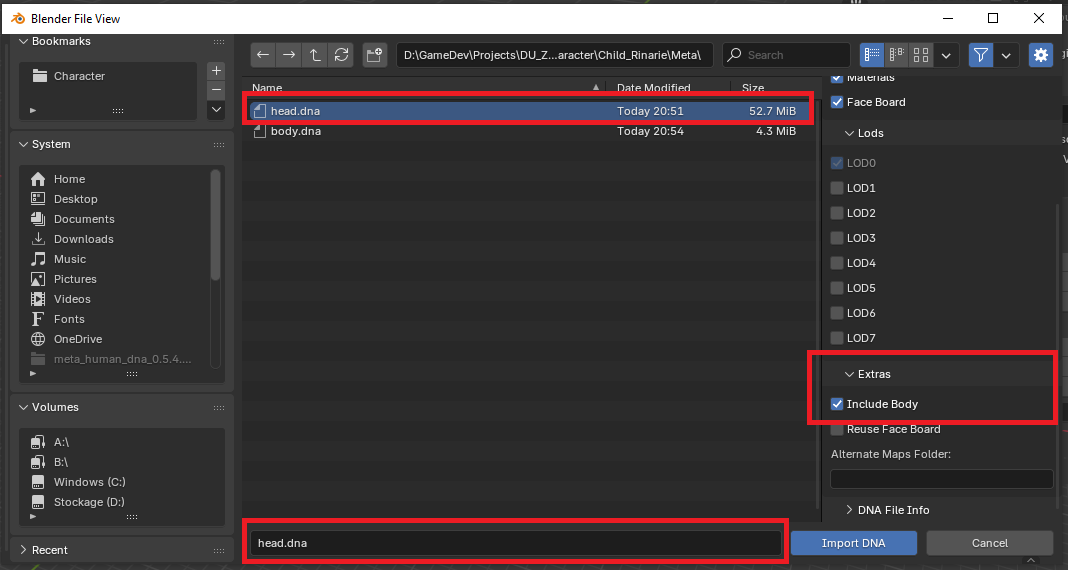
Importing the DNA
Menu path:
File > Import > MetaHuman DNA (.dna)
Make sure you select head.dna.
When head.dna is selected, an extra option will appear allowing you to automatically include the body.dna during import.
Converting the Rig
Important note:
The goal of this workflow is not to re-export the character to MetaHuman Creator.
We want:
- a game-ready rig
- a custom Auto Rig Pro skeleton
- meshes bound to this new rig
So we will replace the original MetaHuman rig.
Steps:
-
Select the body rig only
Make sure the selected rig is the body rig and not the face rig.In my case, the correct rig name is:
head_body_rig -
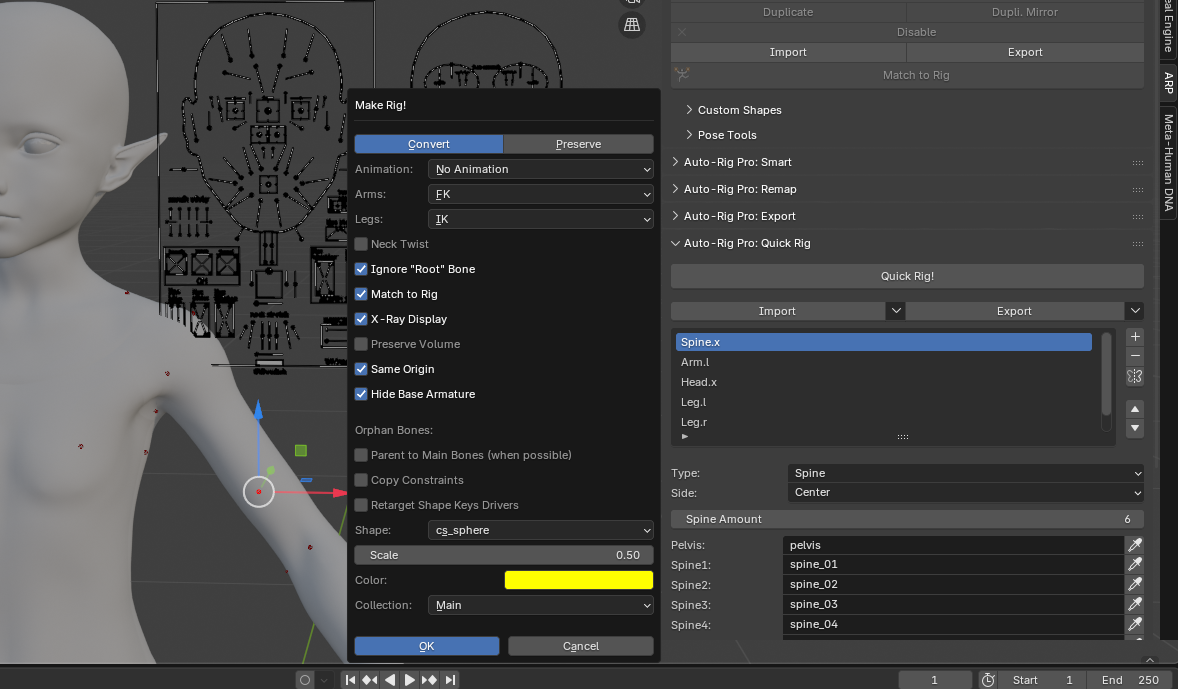
Open Auto Rig Pro > Quick Rig
-
Select the MetaHuman preset
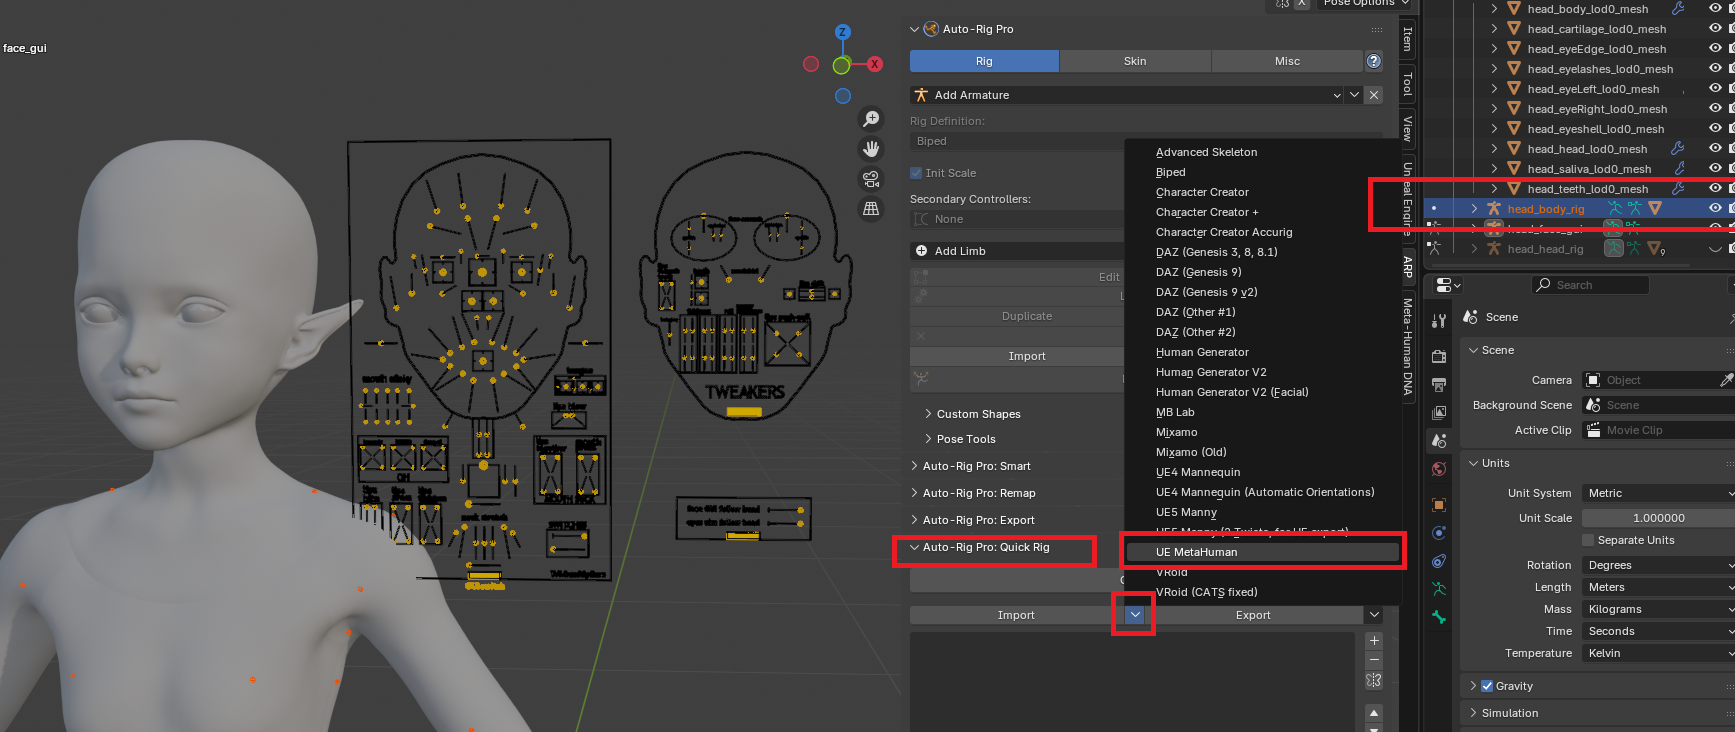
Then use Quick Export and set the mode to Convert.
This converts the DNA-imported rig into an Auto Rig Pro rig.
We do not keep the original rigs, otherwise the final meshes will not be correctly bound.
Result
In this guide, we only use the body.
The head should be exported separately and later parented to the body inside an Unreal Engine Blueprint.

Exporting from Blender
Select the converted rig and click Export in:
Auto Rig Pro > Export
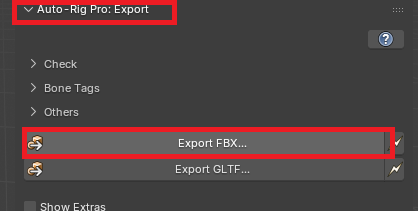
Make sure to enable the correct export settings for Unreal Engine.
Root Motion is not covered in this guide.
It depends on the type of animations you plan to create and should be tested according to your project needs.
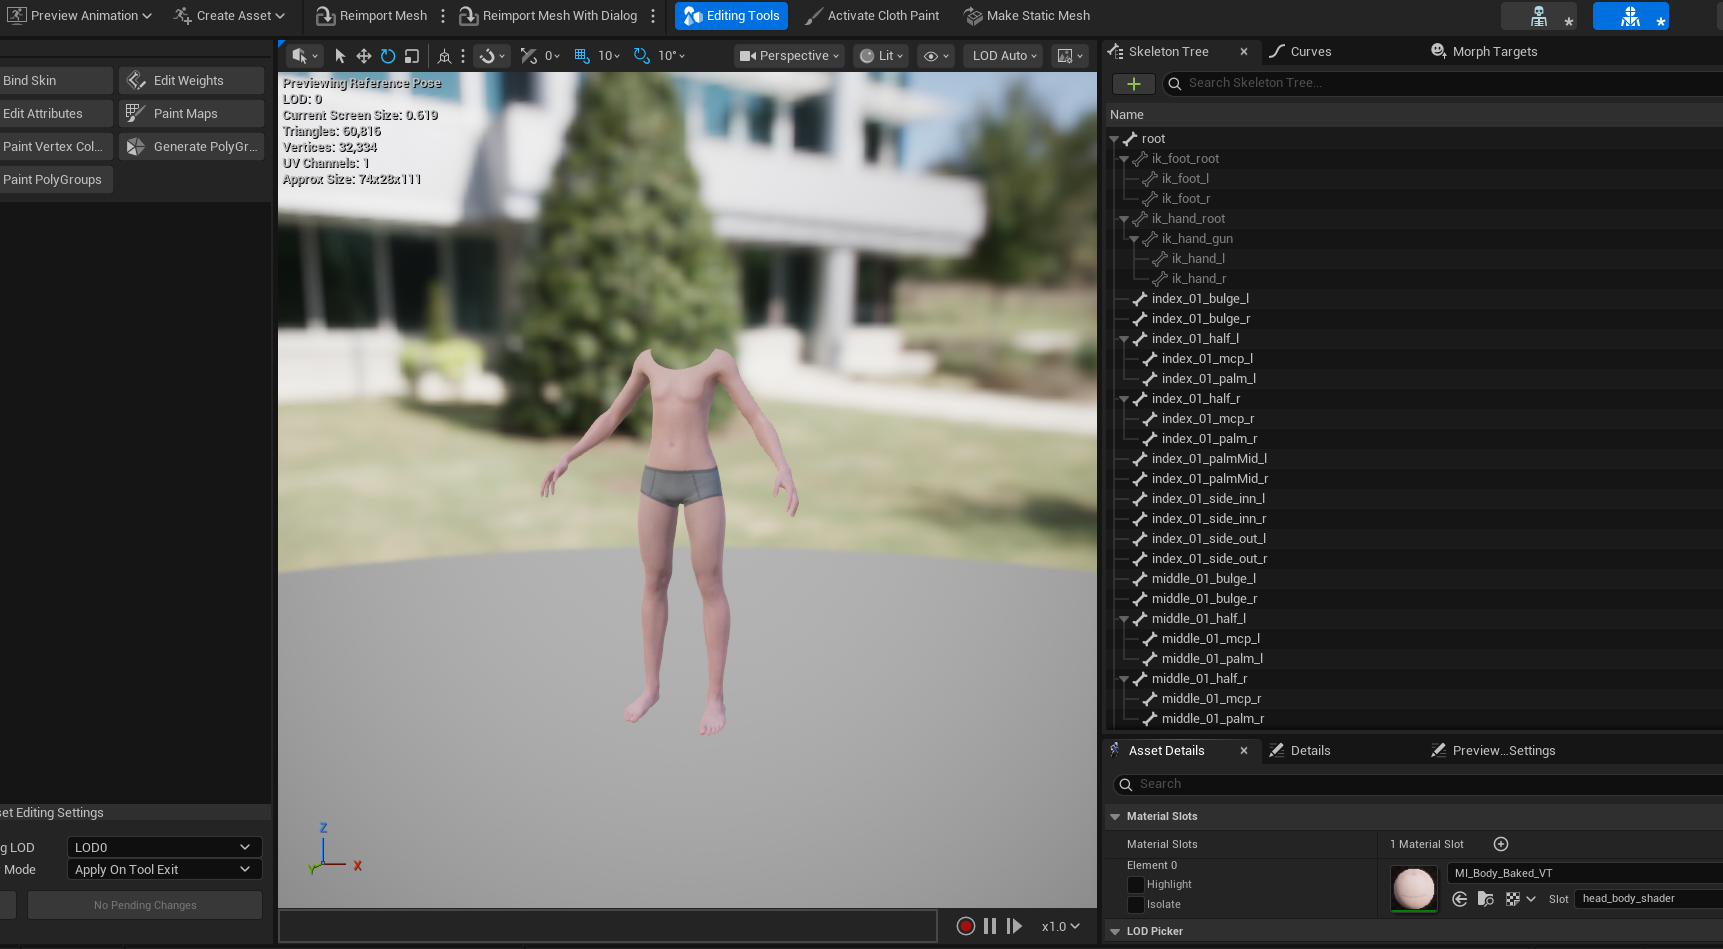
Importing the Skeletal Mesh into Unreal Engine 5
Import the exported FBX as a standard Skeletal Mesh.
After import:
- Assign the original MetaHuman body material
- Verify scale and skeleton orientation
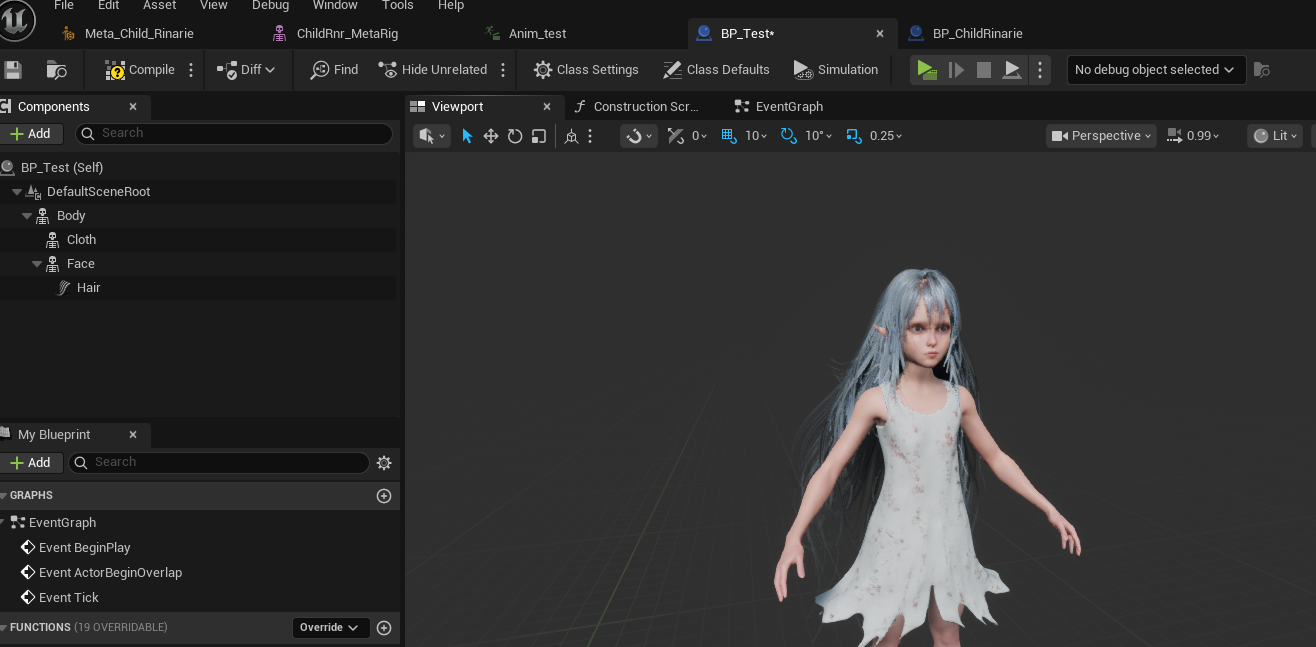
Final Result
Next, you simply need to create your Character Blueprint.
In this example, I am only demonstrating that using a Set Leader Pose Component on your meshes is more than sufficient for basic body animation sharing.
For the head:
- If you want to use facial animations, you should not rely solely on Set Leader Pose.
- Instead, you should take inspiration from the MetaHuman Blueprint Live Link setup, which provides the proper facial animation pipeline.
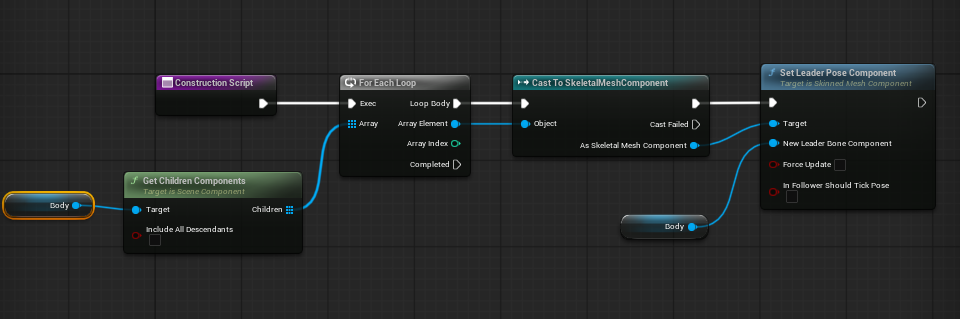
Below is the Construction Script used to set up the Leader Pose Component.
Conclusion
This is a first working version of the workflow, allowing you to:
- animate a MetaHuman body with custom animations
- use the character at runtime in Unreal Engine 5
Animation import and advanced facial workflows are out of scope for this guide.
I may update this post in the future after experimenting with facial animation and head mocap, once the required hardware and data are available.